As with most trades, photographers have their fair share of jargon, but so do videographers.
While Videographers and cinematographers have their own specific equipment and controls they also often share the same things with photographers who use completely different terms.
The result can be extremely confusing to newcomers who are just learning the craft.
The following is a list of common terms used in videography
Aspect Ratio:
Similar to its role in photography, aspect ratio in videography defines the ratio of width to height in an image or screen. It’s the visual harmony expressed as 4:3, 16:9 widescreen, or 2.34 to 1, guiding the framing of your visual story.
The aspect ratio can be applied when shooting or when editing.
Anamorphic:

A cinematic technique where widescreen pictures are shot on standard (35mm film originally) non-widescreen native aspect ratio. The image appears squeezed and requires “de-squeezing” to regain normal proportions, often exhibiting a unique lens flare.
Apple Box:

Not just a fruit crate – it’s a temporary platform originally used to ensure actors share the same height on screen, although today it serves a multitude of uses.
Available in full, half, quarter, or pancake sizes, these boxes play a supporting role in creating visual symmetry.
Boom:
No, not the sound of thunder; it’s a long pole generally attached to a light stand, strategically placed just out of the camera frame to hold lights and microphones.
Bitrate:
A crucial metric measuring the amount of information a video transmits per second, impacting both audio and video quality. The higher the bitrate, the better the quality, but brace yourself for larger file sizes and heavier bandwidth demands.
Codec:
Abbreviated from Coder/Decoder, codecs play a pivotal role in compressing video signals as they are written to a file. Quicktime, MPEG4, H.264 are just some of the more common Codecs.
Contrast Ratio:
It’s a dance of luminance, similar to dynamic range but focused on the ratio of the brightest shades to the darkest shades of the image, adding depth and richness to your visuals.
Clapper:
More than just a theatrical prop, a clapper serves as an informational board, displaying crucial details like scene number, take, director, and more. It’s not just for show; it also aids in syncing sound to video during editing.
Chromakey:

The wizardry of removing a dominant background colour (usually green or blue), often known as “green screen” or “keying.” It’s the gateway to transporting your subject to new realms.
Colour Grading:
It’s not just correction; it’s an artistic touch. Colour grading involves adjusting the image in specific ways to evoke a stylistic effect. Don’t confuse it with colour correction, which ensures consistency across footage from different cameras.
Compression:
The art of shrinking file sizes by removing repetitive data, essential for smoother video uploads and downloads. Codecs come to the rescue, making the digital world a bit more manageable.
Dynamic Range:
The measure in stops between the darkest and brightest parts of an image. The larger the dynamic range, the more information you are capturing between white and black.
False Colour:
A monitor tool, false colour reads exposure levels, tweaking the colour scheme to accentuate details. It’s a subtle art of balancing light and shade.
Focus Pulling:
A delicate art of shifting focus from one subject to another while filming, ensuring the narrative remains visually engaging.
Frame Rate:
This is the heartbeat of your video, representing the speed at which the camera records a scene, measured in frames per second (FPS).
In the simple terms, frame per second means how many frames are squeezed into one second of video. So, if a video is captured and played back at 24fps, that means each second of the video shows 24 distinct still images.
More frames mean a crisper image and more creative latitude in post-production but can often be too crisp and loose that ‘Hollywood’ cinematic feel. Unfortunately, there is no perfect frame rate and it will depend upon what look you want in the video.
The most common frame rates are:
24fps
This is the standard for movies. It was determined to be the minimum speed needed to capture video while still producing realistic motion. Even if a film is shot at a higher frame rate, it’s often edited back to 24fps.
30fps
The standard for television since the early days. Videos with a lot of motion, such as sports, will often benefit from the extra frames per second.
60+fps
60fps has become more popular as 4K video resolution becomes more prevalent. 4K resolution gives a higher frame rate display and provides the footage with a detailed and lifelike look. This frame rate is often used in fast-paced action capture, for example in live sports where blurry imagery is not wanted
Anything higher than 60fps is usually used to create slow-motion video.
If you have a spare 15 minutes this video from Filmmaker IQ gives a good overview on frame rates.
Gaffer:
The unsung hero in charge of lighting on set, ensuring every scene is bathed in the perfect ambiance.
Log Gamma:
Log, or Log gamma is a lot like RAW but doesn’t contain as much detail as RAW and as a result, doesn’t take up as much space. Log has white balance, colour information, ISO, as well as other data linked with the footage, but it won’t look right without colour grading applied to it in post-production.
Most manufacturers have their own version of log such as Sony’s S-Log, Canon’s C-Log, and ARRI’s LogC, giving you the ability to get the best from their sensors.
LUT (Lookup Table):
A magician’s tool in maintaining colour consistency from shot to shot and camera to camera. LUT transforms colour input values from the camera to a predetermined final look, ensuring visual coherence.
Resolution:
Delving into the nitty-gritty details, resolution refers to the actual number of horizontal and vertical pixels in a video frame. From 1080p to 8K, it defines the clarity and precision of your visual narrative.
Pan:
A camera movement from right to left or vice versa, either to follow a subject or reveal more of the surrounding scene.
RAW Video:
RAW video is basically the same as RAW photography files, except a RAW video clip is made up of hundreds or thousands of RAW images. It is also more complicated to work with than you might expect and can be very difficult to use without the right tools or experience.
Unlike photographic RAW image files, RAW video is generally only used in high-end productions.
Sticks:
A casual term for tripods or light stands – because even cameras need a stable place to chill.
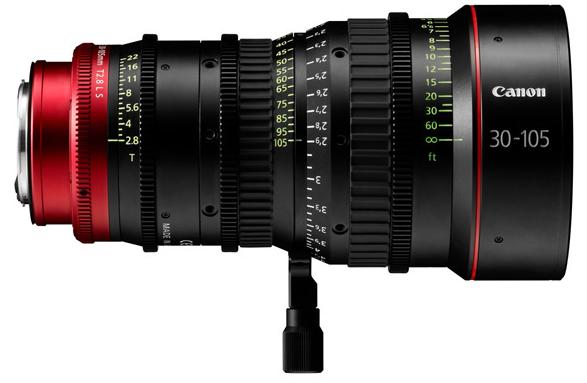
T-Stop:

The cinema version of a photographic lenses f-stop, but unlike photographic f-stops that give a theoretical light value a T-stop provides the actual tested value of the amount of light going through the lens.
Tilt:
A vertical camera movement, capturing the world from a different angle – either looking up or down.
Waveform:
A graphical curve illustrating the brightness of a video signal over time, akin to visualizing the heartbeat of your footage. It’s a tool for meticulous exposure control.
Zebra pattern:

Think of it as your camera’s caution tape. Zebra Stripes, a monitor tool, overlays patterns on your image to warn of potential overexposure.
Armed with this cinematic lexicon, you’re not just a spectator; you’re part of the narrative. Whether you’re capturing life’s fleeting moments or crafting a visual masterpiece, let these terms be the building blocks of your cinematic journey.


